While reading one of the many pages claiming to have "15 Amazing Life Hacks" or something similar, I found a claim about quickly cooling a drink that deserved some investigation. The post claimed that to quickly cool your favorite drink you should wrap the bottle/can in a wet paper towel and put it in the freezer. Supposedly this would quickly cool the drink, faster than just the freezer. My guess is that the thought process says evaporative cooling is the culprit. This is why we sweat, evaporating water does indeed cool the surface. Would water evaporate into the cold, but dry freezer air? Below we'll look at a couple of experiments and decide if this idea works!
We will attack this problem with two approaches. First I'll use two identical pint glasses filled with water and some temperature sensors, then we'll actually put glass bottles in and measure just the end result. While the myth concerns bottles, I want to be able to monitor the temperature during the cooling cycle without opening the bottles. For that we'll use the pint glasses.
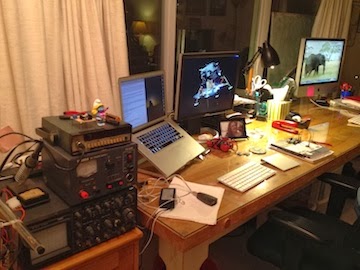
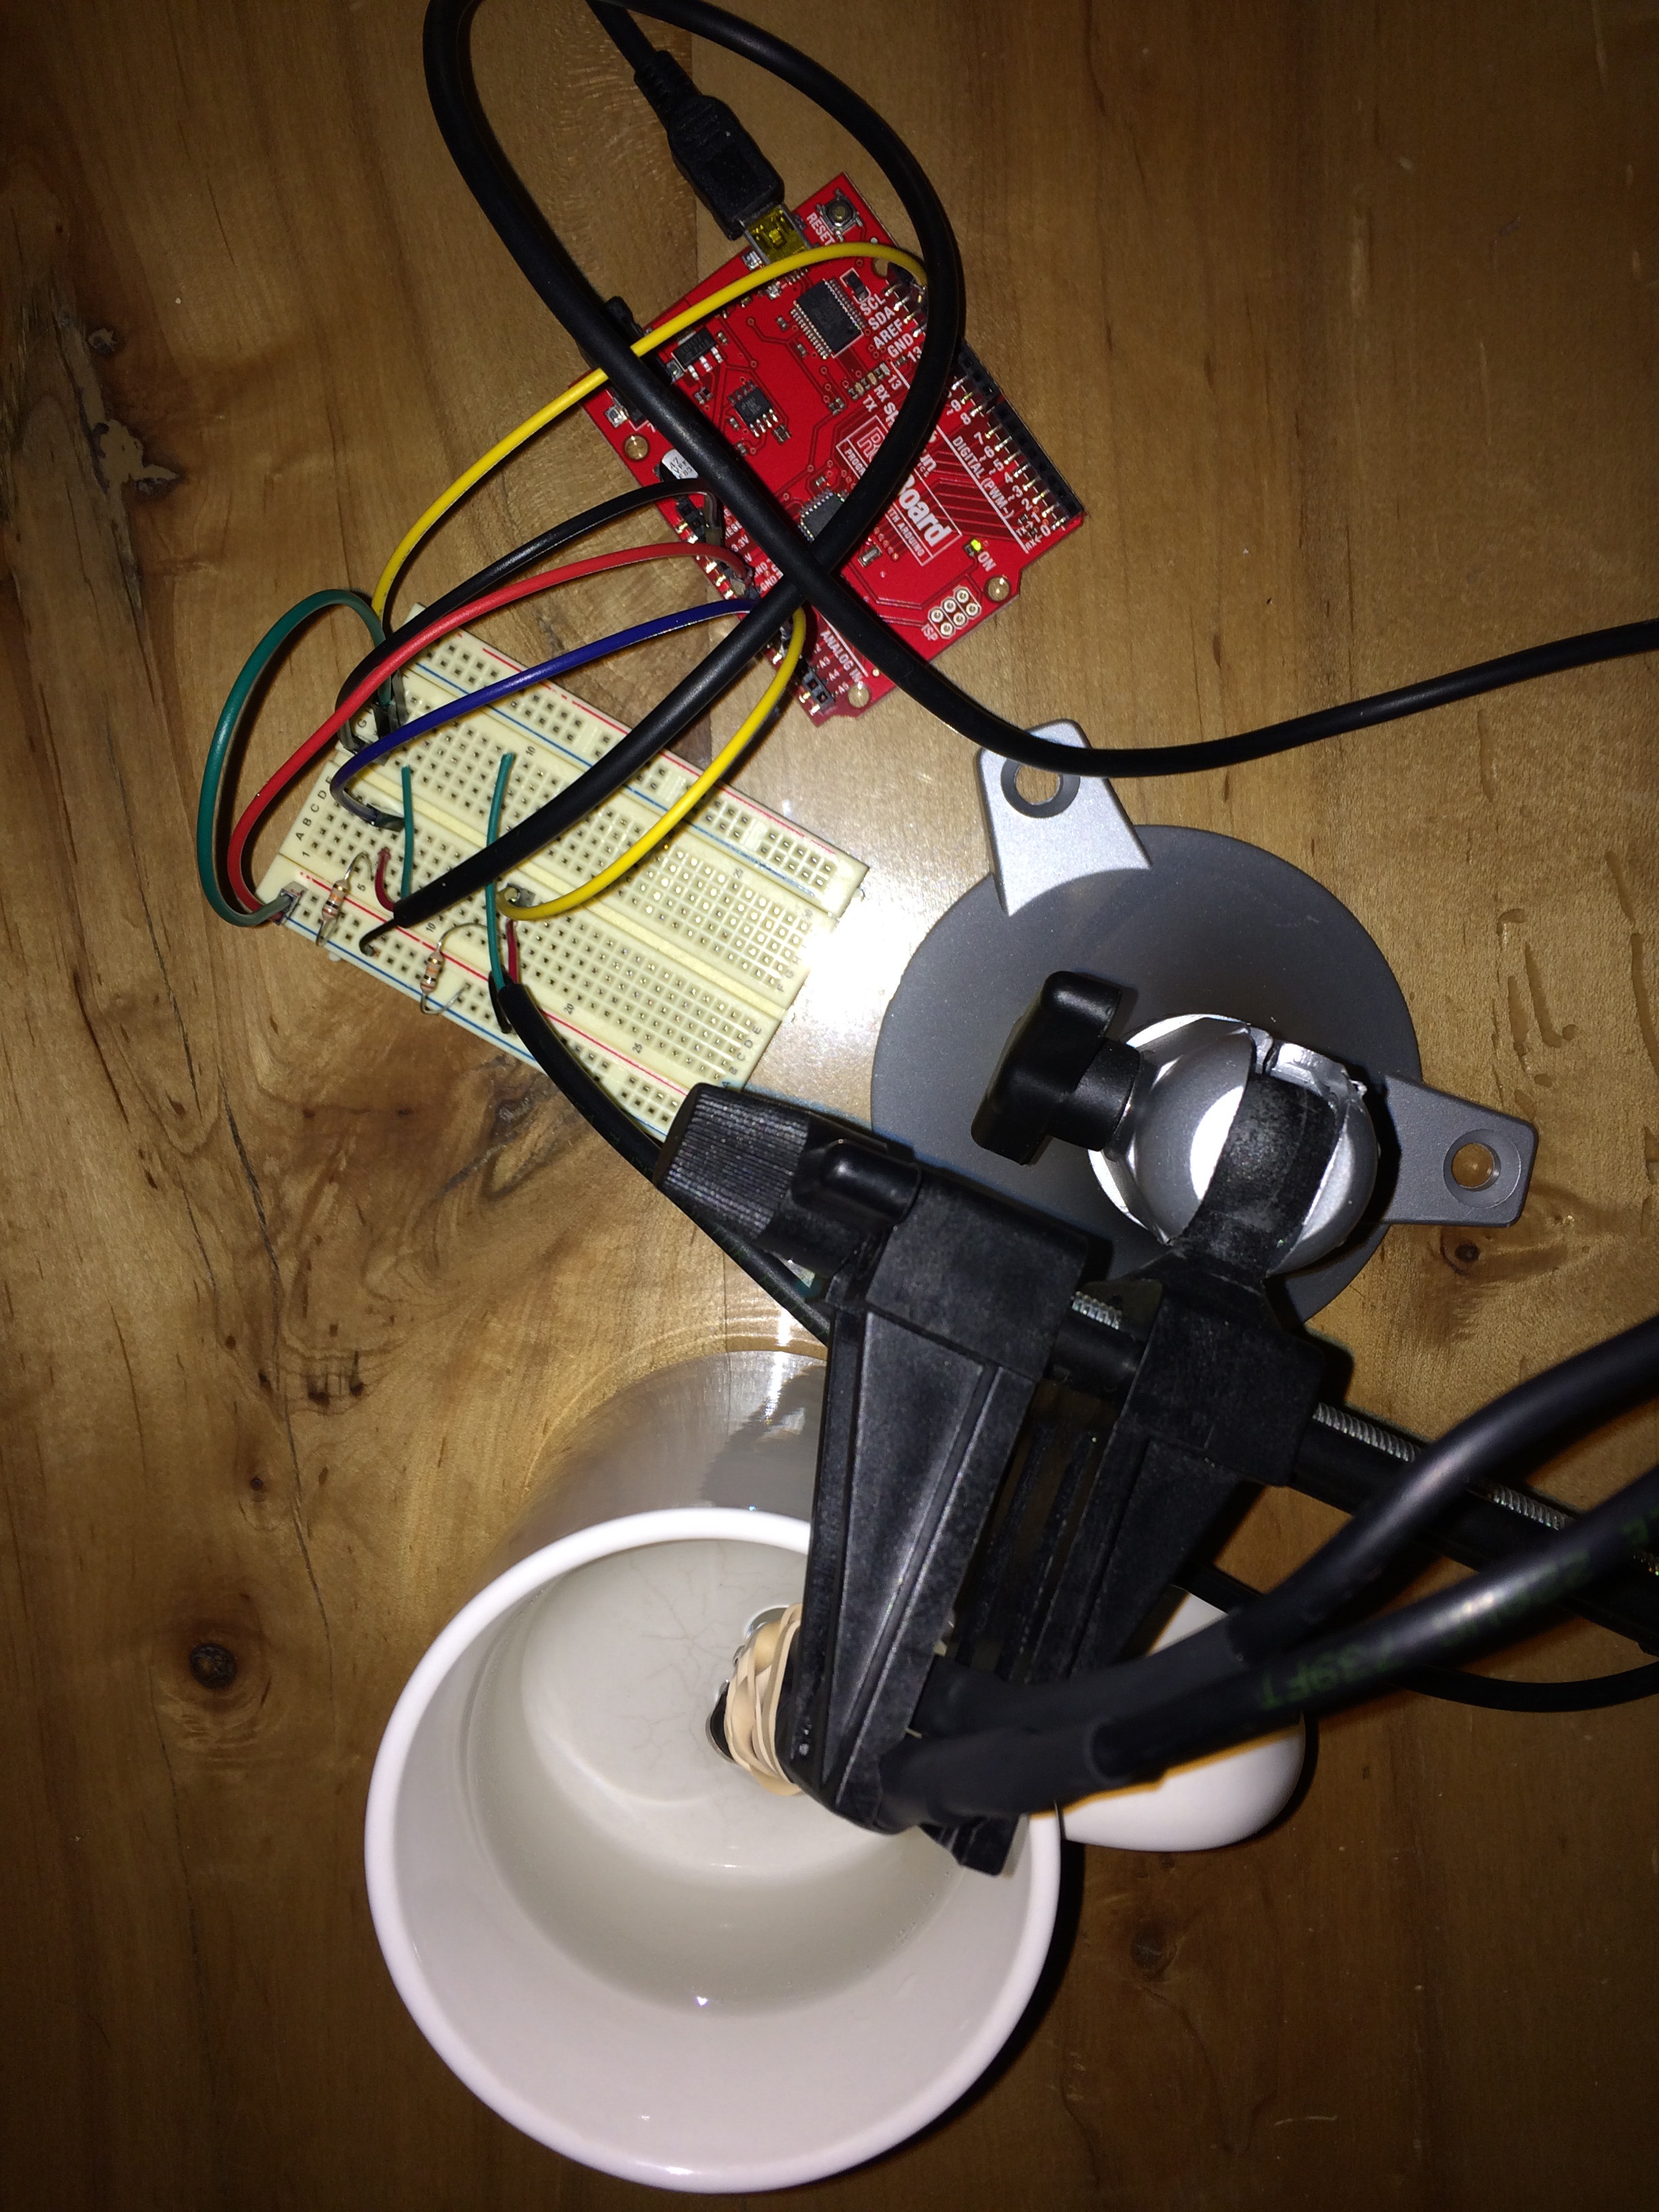
First I had to build the temperature sensors. The sensors are thermistors from DigiKey since they are cheap and relatively accurate as well. To make them fluid safe, I attached some three-lead wire and encapsulated the connections with hot-glue. The entire assembly was then sealed up with heat-shrink tubing. I modified code from an Adafruit tutorial on thermistors and calibrated the setup.
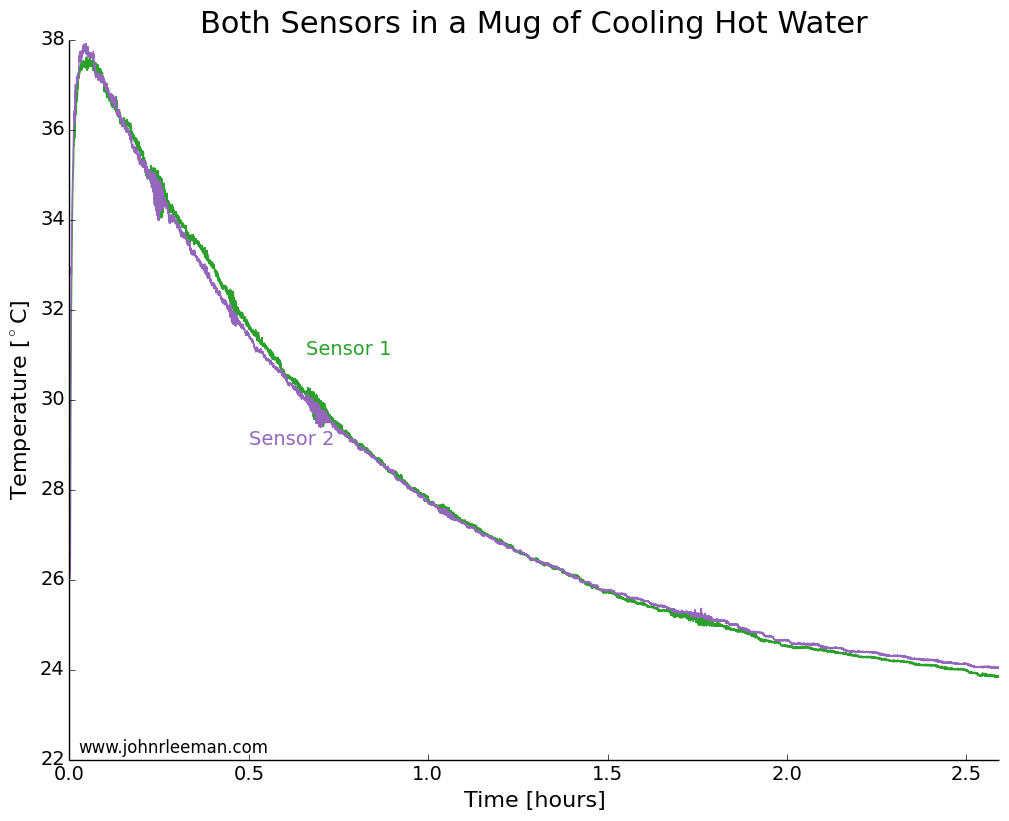
To make sure that both sensors had a similar response time, we need to do a simple control test. I placed both probes in a mug of hot water right beside each other. We would expect to see the same cooling at points so close together, so any offset between the two should be constant. We also expect the cooling to follow a logarithmic pattern. This is because the rate of heat transfer is proportion to the temperature difference between the water and the environment (totally ignoring the mug and any radiative/convective transfer). So when the water is much hotter than the air, it will cool quickly, but when it's only slightly hotter than the air it will take much longer to cool the same amount.
Plotting the data, we see exactly the expected result. Both sensors quickly rise to the water temperature, then the water cools over a couple of hours. The noisy segments of data about 0.25 hrs, 0.75 hrs, and 1.75 hrs in are likely interference from the building air conditioning system.
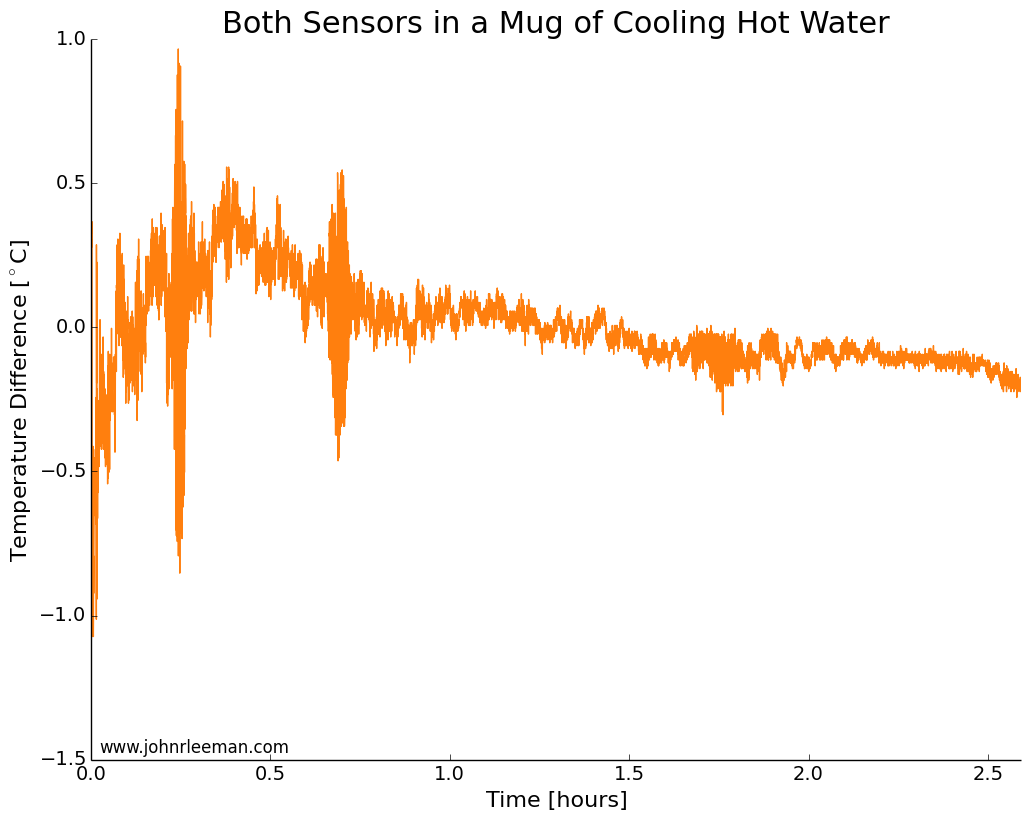
If we plot the temperature difference between the sensors it should be constant since they are sensing the same thing. These probes look to be about dead on after calibration. Other than the noisy segment of data, they are always within 0.5 degrees of each other. Now we can move on to the freezer test.
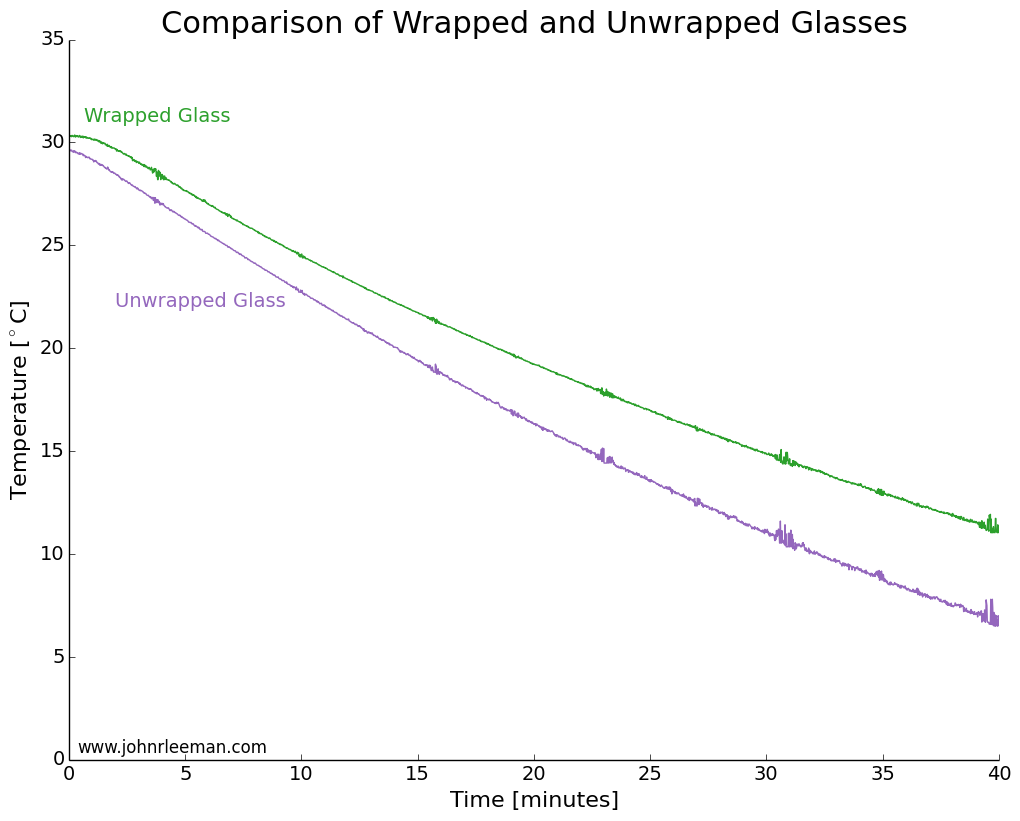
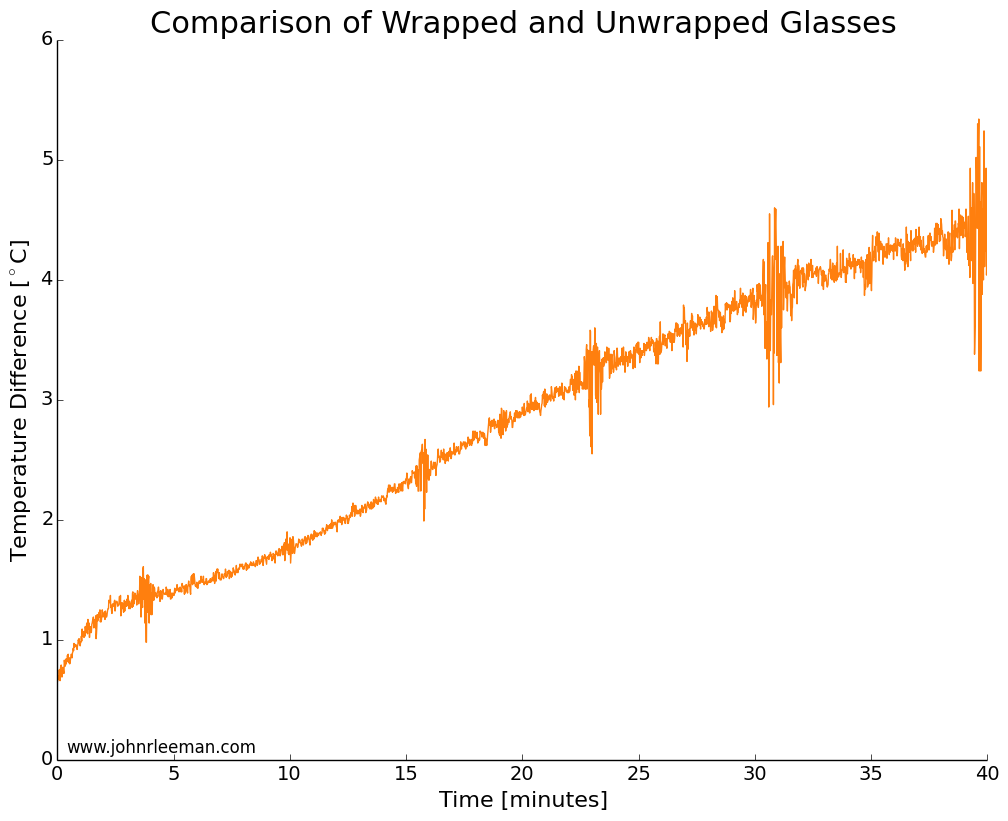
I used two identical pint glasses and made thermocouple supports with cardboard. One glass was wrapped in tap water damped paper towel, the other left as a control. Both were inserted into the freezer at the same time and the temperature monitored. The water was initially the same temperature, but the readings quickly diverged. The noisy data segments reappear at fixed intervals suggesting that the freezer was turning on and off. The temperature difference between the sensors grew very quickly, meaning that the wrapped glass was cooling more slowly than the unwrapped glass. This is the opposite of the myth!
Next I placed two identical, room temperature bottles of soda in the freezer, again with one wrapped and one as a control. After 30 minutes in the freezer, the results showed that the bottles and their contents were practically identical in temperature. The wrapped bottle was slightly warmer, but it was within the resolution of the instruments (thermocouple and IR sensor). I did this test multiple times and always got temperatures within 1 degree of each other, but not consistently favoring one bottle.
So what's happening here? Well, I think that the damp paper towel is actually acting as a jacket for the beverage. Much like covering yourself when it's cold outside, the damp paper towel must be cooled, then the beverage can cool. Adding that extra thermal mass and extra layer for the heat to diffuse through. To provide another test of that hypothesis I again tested bottles with a control and a foam drink cooler around the base. The foam cooler did indeed slow the cooling, the bottle being several degrees warmer than the control.

The last question is why did the test with the glasses show such a pronounced difference, but the bottle test show no difference? My best guess is that the pint glass was totally wrapped vertically and that bottle had the neck exposed still. Another difference could be the thickness of the towel layer and the water content of the towels.
The Conclusion: BUSTED! Depending on how you wrap the paper towel it will either have no effect or slow down the cooling of your favorite drink.
Let me know any other myths I should test! You can also keep up to date with projects and future posts by following me on twitter (@geo_leeman).
Arduino Code:
// which analog pin to connect

#define THERMISTOR1PIN A0

#define THERMISTOR2PIN A1

// resistance at 25 degrees C

#define THERMISTORNOMINAL 10000

// temp. for nominal resistance (almost always 25 C)

#define TEMPERATURENOMINAL 25

// how many samples to take and average, more takes longer

// but is more 'smooth'

#define NUMSAMPLES 15

// The beta coefficient of the thermistor (usually 3000-4000)

#define BCOEFFICIENT 3950

// the value of the 'other' resistor

#define SERIESRESISTOR1 9760

#define SERIESRESISTOR2 9790
int samples1[NUMSAMPLES];
int samples2[NUMSAMPLES];
void setup(void) {
Serial.begin(9600);
analogReference(EXTERNAL);
}
void loop(void) {
uint8_t i;
float average1;
float average2;
// take N samples in a row, with a slight delay
for (i=0; i< NUMSAMPLES; i++) {
samples1[i] = analogRead(THERMISTOR1PIN);
samples2[i] = analogRead(THERMISTOR2PIN);
delay(10);
}
// average all the samples out
average1 = 0;
average2 = 0;
for (i=0; i< NUMSAMPLES; i++) {
average1 += samples1[i];
average2 += samples2[i];
}
average1 /= NUMSAMPLES;
average2 /= NUMSAMPLES;
//Serial.print("Average analog reading ");
//Serial.println(average);
// convert the value to resistance
average1 = 1023 / average1 - 1;
average1 = SERIESRESISTOR1 / average1;
average2 = 1023 / average2 - 1;
average2 = SERIESRESISTOR2 / average2;
//Serial.print("Thermistor resistance ");
Serial.print(average1);
Serial.print(',');
Serial.print(average2);
Serial.print(',');
float steinhart;
steinhart = average1 / THERMISTORNOMINAL; // (R/Ro)
steinhart = log(steinhart); // ln(R/Ro)
steinhart /= BCOEFFICIENT; // 1/B * ln(R/Ro)
steinhart += 1.0 / (TEMPERATURENOMINAL + 273.15); // + (1/To)
steinhart = 1.0 / steinhart; // Invert
steinhart -= 273.15; // convert to C
Serial.print(steinhart);
Serial.print(',');
steinhart = average2 / THERMISTORNOMINAL; // (R/Ro)
steinhart = log(steinhart); // ln(R/Ro)
steinhart /= BCOEFFICIENT; // 1/B * ln(R/Ro)
steinhart += 1.0 / (TEMPERATURENOMINAL + 273.15); // + (1/To)
steinhart = 1.0 / steinhart; // Invert
steinhart -= 273.15; // convert to C(steinhart);
Serial.println(steinhart);
//Serial.println(" *C");
delay(1000);
}