Monthly Archives: August 2011

Building a Fluxgate Magnetometer - Part 1 (and NASA)

Today I want to discuss the first steps in building a simple fluxgate magnetometer for a classroom demonstrator.  Originally this post was going to be a wrap up of NASA work and the magnetometer would come later, but I'm still waiting on my presentation to clear export control so I can post it.  As soon as it does, I'll put it up along with a short article.

This semester I'll be the TA for 'Global Geophysics', mostly doing lab instruction/writing.  After some thought I decided that students need more hands-on classroom geophysics, which is difficult to do.  By its nature geophysics is an outdoor activity with normally expensive instruments.  The instruments are often viewed as a mysterious black box that spits out numbers used to make a map.  This must change.  With a proper understanding of the instruments students will better understand errors in the data, how to troubleshoot in the field, and know why certain hardware limits exist.

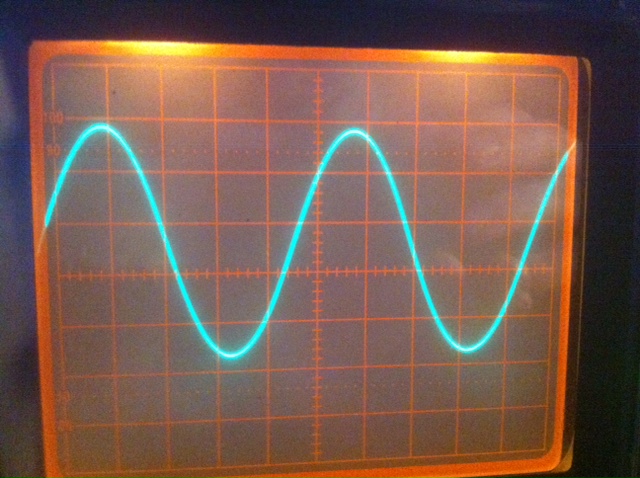
The concept of a fluxgate magnetometer is pretty simple.  Rather than go into detail I'll refer you to this wikipedia article.  This is mainly to chronicle the construction so others can reproduce this (assuming we get a working model).  My design came from a physics lab at Brown University.  The instructions were vague in parts and I'll be taking some liberties as we go along.  This first article will cover construction of the coil and the driver circuit.

The fluxgate coil consists of a driver coil surrounding a soft steel wire, and a secondary coil to pickup signal surrounding the primary coil.  First I took 16ga annealed steel wire from Lowes and cut it to about 1m long, cleaned it, and made it as straight as possible.  Afterwards I wrapped close to 2000 turns of 22ga magnet wire (Radio Shack #278-1345) tightly along its length.  This was then bent in half making a 'U' and that was wrapped with close to 1000 turns of 26ga magnet wire. I used large wire because it will be more durable and I used different gauge wire since the enamel insulation was a different color allowing students to easily see the windings.

That's all there is to the coil.  To increase durability I will probably clear coat the coil and place it into a small acrylic tube so its difficult to bend or break.  The next step is to build a driver for the primary coil.  The Brown lab used a function generator.  Currently I don't have one, nor have I found a suitable cheap unit.  This meant improvising, and luckily Velleman makes a signal generator kit that is just about right.  It operates at 1kHz (the desired frequency for this project) and produces sine, square, triangle, and integrator waves.  The kit was pretty easy to build in just about an hour and works well as seen by the oscilloscope output below, but frequency stability is not phenomenal (especially when then unit is cold).  

Next a few amplifiers need to be designed and built.  The signal generator kit cannot pull the load of the coil, so a simple +/- 9V system will probably do.  The output will also need some kind of amplification.  The lab I found also uses a bandpass filter.  Once the amplifiers are working it will be time to decide if this is necessary and if I want to use an oscilloscope and hardware filters, or an ADC and display the waveform on a computer projector using software filters.  

NASA - Mission Control and Flying the Shuttle

Yesterday I was fortunate enough to go through the mission control facilities here at Johnson Space Center. There is historic mission control from the Apollo and early shuttle days, space shuttle control, ISS control, a training/overflow room, and back rooms. I'm going to share some pictures with you and summarize the setup of mission control and operations.

First we were in historic mission control. This is the famous room seen in the photos of the Apollo 11 landing and made even more well known by the movie 'Apollo 13'. The room is relatively small with a visitor viewing gallery. Each station or console was responsible for a system or set of systems such as guidance, navigation, control, CAPCOM (capsule communicator), etc. Every console has a set of loop buttons. These loops can be thought of as conversations. Say the thermal guys need to talk to attitude control (ADCO) and maneuver the spacecraft so it can cool or heat properly. They would punch up a loop and start talking. Controllers listen to many loops simultaneously, but only talk on one at a time. Eventually all decisions are at the discretion of the flight controller. When a decision is made the CAPCOM (the only person who actually talks to the spacecraft) relays the message.

A little known fact is that those controllers in the 'front room' are not the only personell working on the mission control day to day. There are many 'back rooms' surrounding the control center in which more systems specialists look at various sub-systems and aspects of operation. They report to the front room system manager who then reports to flight control. This design of control is still used today. In addition to subsystem back rooms there are also people like geologists in back rooms that would request astronauts look at certain areas/rocks when on the moon.

Shuttle mission control is now sadly quiet after the recent retirement of the space shuttle after a great 30 year run. I've posted pictures of the shuttle control room before, so I'll save the space here and move onto the International Space Station (ISS) control room.

The ISS control room is similar to shuttle control with one major exception. The ISS is flown from the ground. With the shuttle and Apollo astronauts actually flipped switches and punched up computer programs to fly the vehicle. The ISS astronauts are free to work knowing that their orbit is controlled by the ground. The orbit of the ISS is occasionally boosted to combat continual orbital decay. The orientation of the station is also changed for thermal, scientific, and debris avoidance. Much of the maneuvering is done by speeding up, slowing down, and rotating giant gyroscopes on the station. These moves require no propellant, but there are technical issues (that's for another time though).

There is also a training/overflow control area, but that area is currently undergoing a few remodeling projects.

On a side note I was able to fly the shuttle simulator before it is dismantled. We started at 10,000 ft. on landing approach. I came up just short of the runway the first time, but got it on the ground the second time (even if it wasn't a pretty landing).